Note
Access to this page requires authorization. You can try signing in or changing directories.
Access to this page requires authorization. You can try changing directories.
In this article, you learn how to use Azure Storage Explorer to upload a virtual hard disk (VHD) file to a lab storage account in Azure DevTest Labs. Storage Explorer is a standalone app that runs on Windows, macOS, and Linux. After you upload your VHD file to your lab, you can create a custom image from the uploaded file and use the image to create lab virtual machines (VMs).
Storage Explorer supports several connection options. This article describes how to connect to a storage account associated with your Azure subscription. For information about other Storage Explorer connection options, see Get started with Storage Explorer.
Prerequisites
- Write access to a lab in DevTest Labs.
- A VHD or virtual hard disk v2 (VHDX) virtual hard disk file to upload.
- The latest version of Storage Explorer installed.
Upload a VHD file to a lab
To upload a VHD file to a lab storage account by using Storage Explorer, first get the lab storage account name by using the Azure portal. Then use Storage Explorer to upload the VHD file to the storage account.
Get the lab storage account name
To get the name of the lab storage account:
In the Azure portal, go to the Overview page for your lab.
Select Configuration and policies under Settings in the left navigation.
Select Virtual machine bases > Custom images from the left navigation on the Activity log page.
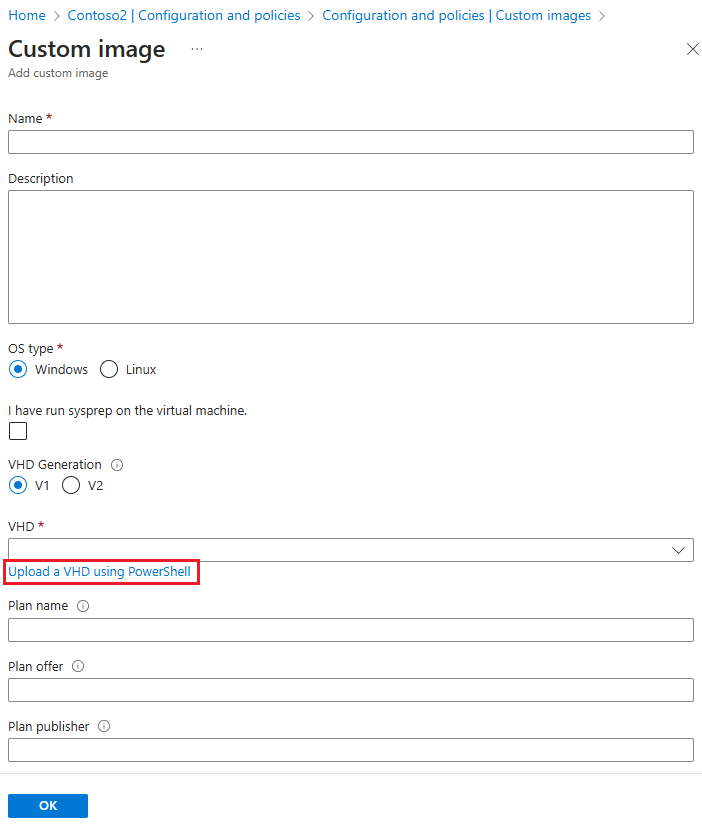
On the Custom images page, select Add.
On the Custom image page, select the Upload a VHD using PowerShell link under VHD.
On the Upload an image using PowerShell page, scroll right to see the call to the
Add-AzureRmVhdcmdlet. TheDestinationparameter contains the URI for the blob container in the formathttps://<storageAccountName>.blob.core.windows.net.
Note the
<storageAccountName>to use in the next section.
Upload the VHD file
When you open Storage Explorer, the Explorer pane shows all the Azure subscriptions you have access to. If you need to add a different account, select the Account Management icon, and then select Add an account.

Follow the prompts to sign in with the Microsoft account associated with the Azure subscription that has your lab.
After you sign in, select the dropdown arrow next to the Azure subscription you want to use.
The left pane shows the storage accounts associated with the selected Azure subscription. If you don't see your storage account listed, select Refresh all.
Select the dropdown arrow next to the lab storage account name you noted earlier, expand Blob Containers, and then select uploads.

In the Storage Explorer right pane, on the blob editor toolbar, select Upload > Upload Files.

On the Upload Files screen, select ... next to Selected files, browse to and select the VHD file on your computer, and then select Open.
For Blob type, select Page Blob.
Select Upload.

Track the upload status in the Activities pane at the bottom of Storage Explorer. Uploading the VHD file might take a long time, depending on the size of the VHD file and your connection speed.

After the VHD file uploads, you can see it in your lab storage account in the Azure portal.
Open your lab storage account by searching for and selecting its name in the Azure Search bar, or by selecting it from Storage accounts.
On the storage account's Overview page, select Data storage > Containers from the left navigation.
On the Containers page, open the Uploads folder to see the uploaded VHD file and any other uploads to the storage account.

Related content
- For more information about VHDs and managed disks in Azure, see Introduction to managed disks.
- Learn how to create a custom image in Azure DevTest Labs from a VHD file by using the Azure portal.
- Learn how to create a custom image in Azure DevTest Labs from a VHD file using PowerShell.