Note
Access to this page requires authorization. You can try signing in or changing directories.
Access to this page requires authorization. You can try changing directories.
Azure Functions provides integrated support for developing, deploying, and managing containerized Function Apps on Azure Container Apps. Use Azure Container Apps for your Functions apps when you need to run in the same environment as other microservices, APIs, websites, workflows, or any container hosted programs. Learn more about running Azure Functions in Container Apps.
Note
While Durable Functions supports several storage providers or backends, autoscaling apps hosted in Azure Container Apps is only available with the Microsoft SQL (MSSQL) backend. If another backend is used, you have to set minimum replica count to greater than zero.
In this article, you learn how to:
- Create a Docker image from a local Durable Functions project.
- Create an Azure Container App and related resources.
- Deploy the image to the Azure Container App and set up authentication.
Prerequisites
- Visual Studio Code installed.
- .NET 8.0 SDK.
- Docker and Docker ID
- Azure CLI version 2.47 or later.
- Azure Functions Core Tools
- Azure account with an active subscription. Create an account for free.
- An HTTP test tool that keeps your data secure. For more information, see HTTP test tools.
Create a local Durable Functions project
In Visual Studio Code, create a .NET isolated Durable Functions project configured to use the MSSQL backend.
Test the app locally and return to this article.
Add Docker-related files
Create a Dockerfile in the project root that describes the minimum required environment to run the function app in a container.
In the project root directory, create a new file named Dockerfile.
Copy/paste the following content into the Dockerfile.
FROM mcr.microsoft.com/dotnet/sdk:8.0 AS installer-env

COPY . /src/dotnet-function-app
RUN cd /src/dotnet-function-app && \
mkdir -p /home/site/wwwroot && \
dotnet publish *.csproj --output /home/site/wwwroot

# To enable ssh & remote debugging on app service change the base image to the one below
# FROM mcr.microsoft.com/azure-functions/dotnet-isolated:4-dotnet-isolated8.0-appservice
FROM mcr.microsoft.com/azure-functions/dotnet-isolated:4-dotnet-isolated8.0
ENV AzureWebJobsScriptRoot=/home/site/wwwroot \
    AzureFunctionsJobHost__Logging__Console__IsEnabled=true

COPY --from=installer-env ["/home/site/wwwroot", "/home/site/wwwroot"]
Save the file.
Add a .dockerignore file with the following content:
local.settings.jsonSave the .dockerignore file.
Build the container image
Build the Docker image. Find the complete list of supported base images for Azure Functions in the Azure Functions Base by Microsoft | Docker Hub
Start the Docker daemon.
Sign in to Docker with the
docker logincommand.When prompted, log in with your username and password. A "Login Succeeded" message confirms that you're signed in.
Navigate to your project root directory.
Run the following command to build the image, replacing
<DOCKER_ID>with your Docker Hub account ID:dockerId=<DOCKER_ID> imageName=IMAGE_NAME> imageVersion=v1.0.0 docker build --tag $dockerId/$imageName:$imageVersion .Note
If you're running on an M-series Mac, use
--platform linux/amd64instead.Push the image to Docker:
docker push $dockerId/$imageName:$imageVersionDepending on network speed, the initial image push might take a few minutes. While you're waiting, proceed to the next section.
Create Azure resources
Create the Azure resources necessary for running Durable Functions on a container app.
- Azure resource group: Resource group containing all created resources.
- Azure Container App environment: Environment hosting the container app.
- Azure Container App: Image containing the Durable Functions app is deployed to this app.
- Azure Storage Account: Required by the function app to store app-related data, such as application code.
Initial set up
In a new terminal, log in to your Azure subscription:
az login

az account set -s <subscription_name>
Run the required commands to set up the Azure Container Apps CLI extension:
az upgrade

az extension add --name containerapp --upgrade

az provider register --namespace Microsoft.App

az provider register --namespace Microsoft.OperationalInsights
Create container app and related resources
A workload profile determines the amount of compute and memory resources available to the container apps deployed in an environment. Create a Consumption workload profile for scale-to-zero support and pay-per-use.
Set the environment variables.
location=<REGION>
resourceGroup=<RESOURCE_GROUP_NAME>
storage=<STORAGE_NAME>
containerAppEnv=<CONTAINER_APP_ENVIRONMNET_NAME>
functionApp=<APP_NAME>
vnet=<VNET_NAME>
Create a resource group.
az group create --name $resourceGroup --location $locationCreate the container app environment.
az containerapp env create \
  --enable-workload-profiles \
  --resource-group $resourceGroup \
  --name $containerAppEnv \
  --location $location \
Create a container app based on the Durable Functions image.
az containerapp create --resource-group $resourceGroup \
--name $functionApp \
--environment $containerAppEnv \
--image $dockerId/$imageName:$imageVersion \
--ingress external \
--kind functionapp \
--query properties.outputs.fqdn
Make note of the app URL, which should look similar to
https://<APP_NAME>.<ENVIRONMENT_IDENTIFIER>.<REGION>.azurecontainerapps.io.
Create databases
Create an Azure Storage account, which is required by the function app.
az storage account create --name $storage --location $location --resource-group $resourceGroup --sku Standard_LRSIn the Azure portal, create an Azure SQL database to persist state information. During creation:
- Enable Azure services and resources to access this server (under Networking)
- Set the value for Database collation (under Additional settings) to
Latin1_General_100_BIN2_UTF8.
Note
Refrain from enabling the Allow Azure services and resources to access this server setting for production scenarios. Production applications should implement more secure approaches, such as stronger firewall restrictions or virtual network configurations.
Configure identity-based authentication
Managed identities make your app more secure by eliminating secrets from your app, such as credentials in the connection strings. While you can choose between system-assigned and user-assigned managed identity, user-assigned managed identity is recommended, as it's not tied to the app lifecycle.
In this section, you set up user-assigned managed identity for Azure Storage.
Set the environment variables.
subscription=<SUBSCRIPTION_ID>
identity=<IDENTITY_NAME>
Create a managed identity resource.
echo "Creating $identity"
az identity create -g $resourceGroup -n $identity --location "$location"
Assign the user identity to the container app.
echo "Assigning $identity to app"
az containerapp identity assign --resource-group $resourceGroup --name $functionApp --user-assigned $identity
Set the scope of the role-based access control (RBAC) permissions.
scope="/subscriptions/$subscription/resourceGroups/$resourceGroup/providers/Microsoft.Storage/storageAccounts/$storage"Get the user identity's
clientId.# Get the identity's ClientId clientId=$(az identity show --name $identity --resource-group $resourceGroup --query 'clientId' --output tsv)Assign the role Storage Blob Data Owner role for access to the storage account.
echo "Assign Storage Blob Data Owner role to identity"
az role assignment create --assignee "$clientId" --role "Storage Blob Data Owner" --scope "$scope"
Set up app settings
Note
Authenticating to the MSSQL database using managed identity isn't supported when hosting a Durable Functions app in Azure Container Apps. For now, this guide authenticates using connection strings.
From the SQL database resource in the Azure portal, navigate to Settings > Connection strings to find the connection string.
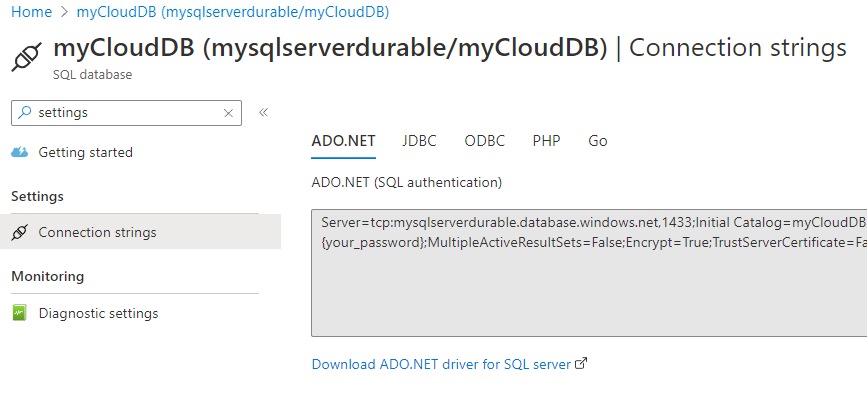
The connection string should have a format similar to:
dbserver=<SQL_SERVER_NAME>
sqlDB=<SQL_DB_NAME>
username=<DB_USER_LOGIN>
password=<DB_USER_PASSWORD>

connStr="Server=tcp:$dbserver.database.windows.net,1433;Initial Catalog=$sqlDB;Persist Security Info=False;User ID=$username;Password=$password;MultipleActiveResultSets=False;Encrypt=True;TrustServerCertificate=False;Connection Timeout=30;"
If you forget the password from the previous database creation step, you can reset it on the SQL server resource.

Store the SQL database's connection string as a secret called sqldbconnection in the container app.
az containerapp secret set \
--resource-group $resourceGroup \
--name $functionApp \
--secrets sqldbconnection=$connStr
Add the following settings to the app:
az containerapp update \
-n $functionApp \
-g $resourceGroup \
--set-env-vars SQLDB_Connection=secretref:sqldbconnection \
AzureWebJobsStorage__accountName=$storage \
AzureWebJobsStorage__clientId=$clientId \
AzureWebJobsStorage__credential=managedidentity \
FUNCTIONS_WORKER_RUNTIME=dotnet-isolated
Test locally
Use an HTTP test tool to send a
POSTrequest to the HTTP trigger endpoint, which should be similar to:https://<APP NAME>.<ENVIRONMENT_IDENTIFIER>.<REGION>.azurecontainerapps.io/api/DurableFunctionsOrchestrationCSharp1_HttpStartThe response is the HTTP function's initial result letting you know that the Durable Functions orchestration started successfully. While the response includes a few useful URLs, it doesn't yet display the orchestration's end result.
Copy/paste the URL value for
statusQueryGetUriinto your browser's address bar and execute. Alternatively, you can continue to use the HTTP test tool to issue theGETrequest.The request queries the orchestration instance for the status. You should see that the instance finished and the outputs or results of the Durable Functions app.
{
    "name":"HelloCities",
    "instanceId":"7f99f9474a6641438e5c7169b7ecb3f2",
    "runtimeStatus":"Completed",
    "input":null,
    "customStatus":null,
    "output":"Hello, Tokyo! Hello, London! Hello, Seattle!",
    "createdTime":"2023-01-31T18:48:49Z",
    "lastUpdatedTime":"2023-01-31T18:48:56Z"
}
Next steps
Learn more about:
- Azure Container Apps hosting of Azure Functions.
- MSSQL storage provider architecture, configuration, and workload behavior.
- The Azure-managed storage backend, Durable Task Scheduler.