Note
Access to this page requires authorization. You can try signing in or changing directories.
Access to this page requires authorization. You can try changing directories.
This article provides a tutorial for you to learn how to create a cloud flow using Copilot. Copilot is a feature in Power Automate that helps you create flows using natural language. You can also use Copilot to add actions and modify existing flows.
Once you create a flow, we recommend that you test it. The completed flow in this tutorial sends an email weekly to a customer with an overdue account.
Build a cloud flow using Copilot
The Power Automate maker portal provides multiple ways to create workflows for your organization. For this tutorial, you create and modify a cloud flow using Copilot.
Sign in to Power Automate.
In the Copilot field, describe what kind of flow you want to create. Use natural language and be as specific as possible.
Copy the following prompt and paste it into the Copilot field:
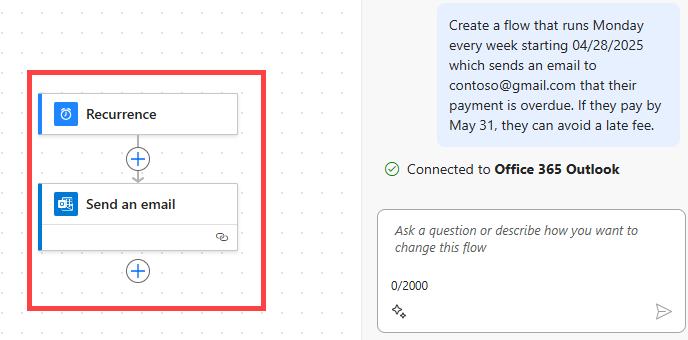
Create a flow that runs Monday every week starting 04/28/2025 which sends an email to [email protected] that their payment is overdue. If they pay by May 31, they can avoid a late fee.Select Generate.

Based on the description, Copilot begins to create a suggested trigger and actions for your flow. In this example, the trigger is Recurrence and the action is Send an email.
Select Keep it and continue.

Review your connected apps and services. A green checkmark indicates that the connection is valid. In this example, the connection is Office 365 Outlook.
Select Create flow.
A new flow is created and opens in the designer. The flow consists of the Recurrence trigger and Send an email action based on your prompt.
Important
Make sure the AI-generated content from Copilot is accurate and appropriate before using it. You should review and edit responses and manually check facts, data, and text before you use the AI-generated content.
Learn more in Human review for automation with a prompt and Are Copilot's responses always factual?
Use Copilot to make changes to an action
After your flow is created, you can make changes manually, or you can use Copilot to assist you.
In this section, change the subject for your email from Payment Overdue Notification to Your account is overdue in the Copilot panel.
In the designer, select Send an email. Notice that in the configuration pane to the left, the subject is Payment Overdue Notification.

Close the configuration pane by selecting Collapse (<<) in the top-right corner.
Copy the following prompt and paste it into the Copilot pane:
Change the subject of the email to "Your account is overdue".Select Submit. Copilot updates the action in the designer.
In the Send an email action in the designer, select the bubble icon to display the updated subject, Your account is overdue.

On the toolbar at the top of the screen, select Save.
A green message appears at the top of the screen, indicating that your flow was saved successfully.

Test your flow
To make sure your flow works as expected, you should test it.
On the toolbar, select Test.
In the Test your flow pane, select Manually, and then select Test.
In the Run flow pane, select Run flow.
When the flow run starts successfully (indicated by a green checkmark), select Done.

When your flow is finished running, the message, Your flow ran successfully appears in a green message at the top. Your flow is now listed in My flows.
To display your flow, leave the designer by selecting Back in the top-left corner.
On the navigation menu to the left, select My flows.

Congratulations! You successfully created a cloud flow using Copilot and tested it!