Note
Access to this page requires authorization. You can try signing in or changing directories.
Access to this page requires authorization. You can try changing directories.
This article shows you how to add an MQTT source to an eventstream.
MQTT is a publish-subscribe messaging transport protocol that was designed for constrained environments. It's the go-to communication standard for IoT scenarios due to efficiency, scalability, and reliability. Microsoft Fabric event streams allow you to connect to an MQTT broker, where messages in MQTT broker to be ingested into Fabric eventstream, and routed to various destinations within Fabric.
Note
This source is not supported in the following regions of your workspace capacity: West US3, Switzerland West.
Prerequisites
Before you start, you must complete the following prerequisites:
- Access to the Fabric premium workspace with Contributor or higher permissions.
- Gather Username and password to connect to the MQTT broker.
- Ensure that the MQTT broker is publicly accessible and not restricted by a firewall or a virtual network.
Launch the Select a data source wizard
If you haven't added any source to your eventstream yet, select Use external source tile.

If you're adding the source to an already published eventstream, switch to Edit mode, select Add source on the ribbon, and then select External sources.

On the Select a data source page, search for and select Connect on the MQTT tile.

Configure MQTT connector
On the Connect page, select New connection.

If there's an existing connection to your MQTT source, select that existing connection.
In the Connection settings section,
For MQTT Broker URL, enter the URL of your MQTT broker, starting with
tcp://.Note
The MQTT source currently supports only the PLAIN-TEXT MQTT protocol between your MQTT broker and eventstream.
For Connection name, enter a name for the connection to the MQTT.
Enter the Username and Password for the MQTT broker.

Select Connect.
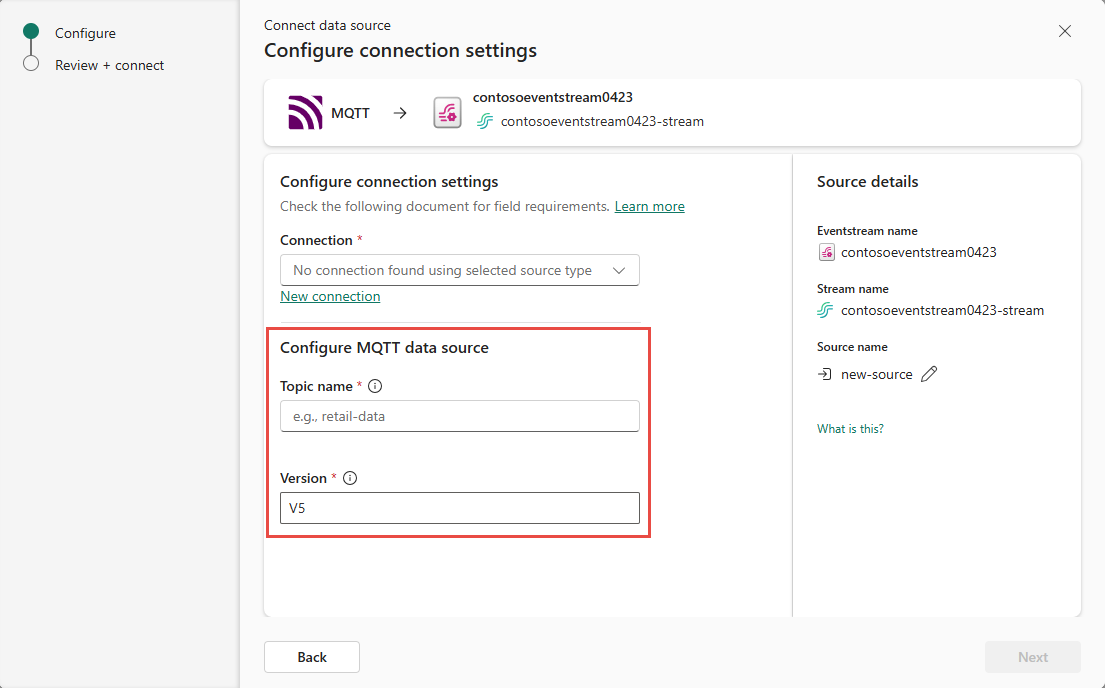
Now, on the Connect page of the wizard, you must enter a single Topic name. Multiple topics aren't supported yet.
For Version, only MQTT V5 is currently supported.
Then, select Next
On the Review + connect page, review settings, and select Add or Connect.


Note
The maximum number of sources and destinations for one eventstream is 11.
View updated eventstream
You see that the MQTT source is added to your eventstream on the canvas in the Edit mode. To publish it to live, select Publish on the ribbon.

After you complete these steps, the source is available for visualization in the Live view. Select the MQTT tile in the diagram to see the page similar to the following one.


Related content
For a list of all supported sources, see Add and manage an event source.