Note
Access to this page requires authorization. You can try signing in or changing directories.
Access to this page requires authorization. You can try changing directories.
This article shows you how to add an Azure Event Grid Namespace source to an eventstream.
Prerequisites
- Access to a workspace in the Fabric capacity license mode (or) the Trial license mode with Member or higher permissions.
- Enable managed identity on the Event Grid namespace.
- Enable MQTT and routing on the Event Grid namespace, if you want to receive Message Queuing Telemetry Transport (MQTT) data.
- Create an eventstream if you don't have one.
To ensure the managed identity of the Event Grid namespace has the required permissions, configure the necessary settings in the Admin portal:
Select Settings (gear icon) in the top-right corner.
Select Admin portal in the Governance and insights section.

Activate the following tenant setting to grant the service principal access to Fabric APIs for creating workspaces, connections, or deployment pipelines.
On the Tenant settings page, in the Developer settings section, expand Service principal can use Fabric API option.
Toggle to Enabled.
Apply to the entire organization.
Select Apply.

Enable this option to access all other APIs (enabled by default for new tenants):
- On the Tenant settings page, in the Developer settings section, expand Allow Service principals to create and use profiles option.
- Toggle to Enabled.
- Apply to the entire organization.
- Select Apply.


Launch the Select a data source wizard
If you haven't added any source to your eventstream yet, select Use external source tile.

If you're adding the source to an already published eventstream, switch to Edit mode, select Add source on the ribbon, and then select External sources.

On the Select a data source page, search for and select Connect on the Azure Event Grid Namespace tile.

Configure Azure Event Grid connector
On the Configure connection settings page, follow these steps:
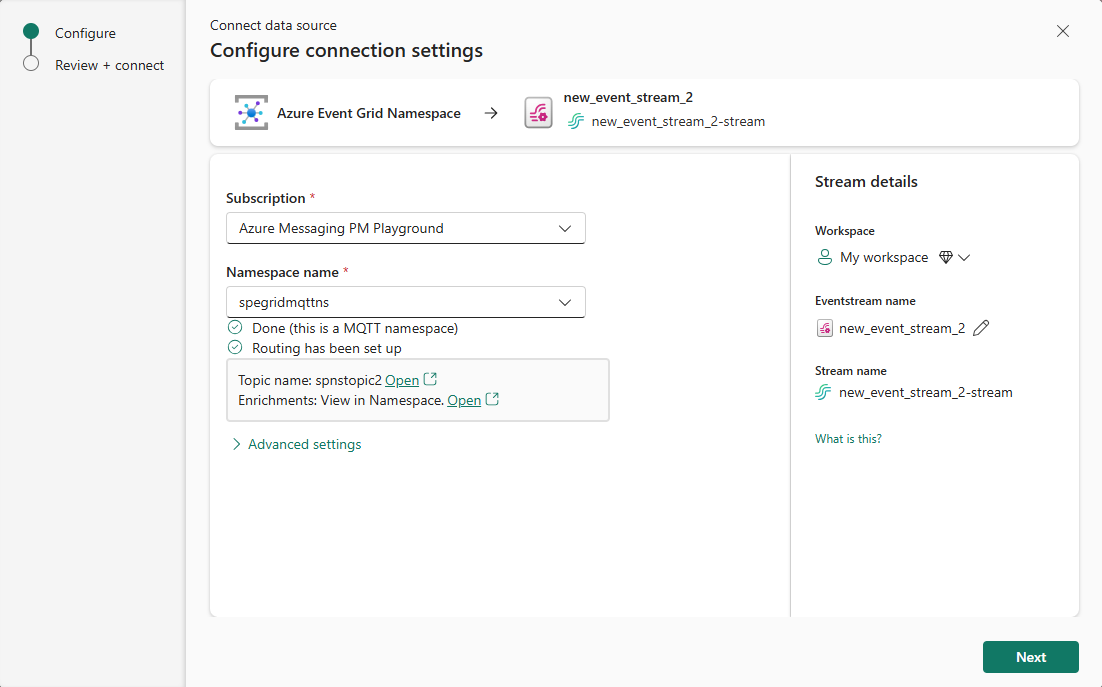
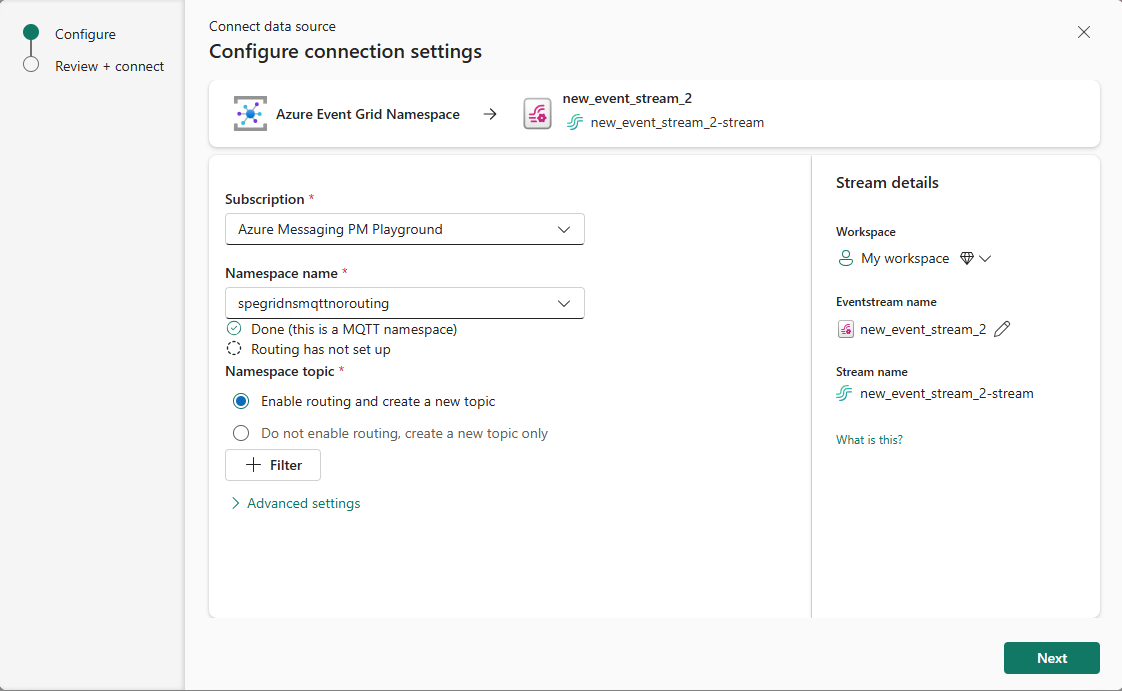
For Subscription, select the Azure subscription that has the Event Grid namespace.
For Namespace name, select your Event Grid namespace from the drop-down list.
The Namespace topic section you see varies depending on whether Message Queuing Telemetry Transport (MQTT) is enabled or not.
If MQTT isn't enabled for the namespace topic, create a new topic or select an existing topic.

If the namespace has MQTT enabled, a topic, and routing enabled:
If the namespace has MQTT enabled, but routing isn't enabled for the namespace:
If you're using Real-Time hub, follow these steps:
In the Stream details section to the right, select the Fabric workspace where you want to save the eventstream that the Wizard is going to create.
For eventstream name, enter a name for the eventstream. The wizard creates an eventstream with the selected Event Grid namespace as a source.
The Stream name is automatically generated for you by appending -stream to the name of the eventstream. You can see this stream on the Real-time hub All data streams page when the wizard finishes.

If you're using the Eventstream editor to add an Event Grid namespace as a source to an event stream, select pencil button under Source name, and enter a source name.
Select Next at the bottom of the page.
On the Review + connect page, review settings, and select Connect.

If the namespace has both MQTT and routing enabled:

If the namespace has MQTT enabled, but routing isn't enabled:

Note
The maximum number of sources and destinations for one eventstream is 11.
View updated eventstream
On the Review + connect page, select Add.
You see that the Event Grid source is added to your eventstream on the canvas in the Edit mode. To implement this newly added Azure Event Grid namespace, select Publish on the ribbon.

After you complete these steps, the Azure Event Grid namespace is available for visualization in the Live view. Select the Event Grid Namespace tile in the diagram to see details about the source.

Related content
To learn how to add other sources to an eventstream, see the following article: Add and manage an event source in an eventstream.