Note
Access to this page requires authorization. You can try signing in or changing directories.
Access to this page requires authorization. You can try changing directories.
All deployments start with the volumes for a single SAP HANA host. This is the case even for large, multiple-host installations. The shared, log-backup, and data-backup volumes are created only for the first host. All other hosts in a multiple-host environment share these volumes, and they add only data and log volumes for each additional host.
This article describes how to deploy the first SAP HANA host using Azure NetApp Files application volume group for SAP HANA.
Before you begin
Understand the requirements and considerations for application volume group for SAP HANA.
Application volume group for SAP HANA enables you to select Standard network features and availability zone volume placement without using volume pinning. Alternately, adhere to the pinning recommendations. Have at least one HANA virtual machine (VM) in the availability set started.
Steps
From your NetApp account, select Application volume groups, then +Add Group.

In Deployment Type, select SAP HANA then Next.

In the SAP HANA tab, provide HANA-specific information:
- SAP ID (SID):
The three alphanumeric-character SAP HANA system identifier. - Group name:
The volume group name. For a multiple-host SAP HANA system, each host creates its own group. Because you're creating the first host, the group name starts with
'Name-proposal'-00001. - SAP node memory:
This value defines the size of the SAP HANA database on the host. It's used to calculate the required volume size and throughput. - Capacity overhead (%):
When you use snapshots for data protection, you need to plan for extra capacity. This field adds an additional size (%) for the data volume. You can estimate this value by using"change rate per day" X "number of days retention". - Single-host:
Select this option for an SAP HANA single-host system or the first host for a multiple-host system. Only the shared, log-backup, and data-backup volumes are created with the first host. - Multiple-host: Select this option for adding additional hosts to a multiple-hosts HANA system.
Select Next: Volume Group.

- SAP ID (SID):
In the Volume group tab, provide information for creating the volume group:
Availability option:
Select either Availability zone or Proximity placement group. When selecting Availability zone, you must select the appropriate availability zone in the next field.
- Proximity placement group (PPG):
Specifies that the data, log, and shared volumes are to be created close to the VMs. - Availability Zone: This option lets you deploy the volumes in the logical availability zone that you specify. Select an availability zone where Azure NetApp Files resources are present. For details, see Manage availability zone volume placement.
- Proximity placement group (PPG):
Network features:
Standard network features is the default, however you can still use Basic network features. See Configure network features for a volume and Guidelines for Azure NetApp Files network planning for details.
Capacity pool:
All volumes are placed in a single manual QoS capacity pool. If you want to create the log-backup and data-backup volumes in a separate capacity pool, you can choose not to add those volumes to the volume group.Virtual network:
Specify an existing VNet where the VMs are placed.Subnet:
Specify the delegated subnet where the IP addresses for the NFS exports are created. Ensure that you have a delegated subnet with enough free IP addresses.Encryption key source:
Select Customer Managed Key or Microsoft Managed Key. If you choose Customer Managed Key, provide the key vault private endpoint.
Select Next: Tags.

In the Tags section of the Volume Group tab, you can add tags as needed for the volumes.
Select Next: Protocol.

In the Protocols section of the Volume Group tab, you can modify the Export Policy, which should be common to all volumes.
Select Next: Volumes.

The Volumes tab summarizes the volumes being created, showing protocol, volume name, quota, and throughput.
The Volumes tab also shows that only the data, log, and shared volumes are created close to the HANA VMs. The other volumes (data-backup and log-backup) are created at a different location within the region.
The creation for the data-backup and log-backup volumes is optional.

In the Volumes tab, you can select each volume to view or change the volume details. For example, select "data-volume-name".
Not all settings can be changed because of SAP HANA certification restrictions.
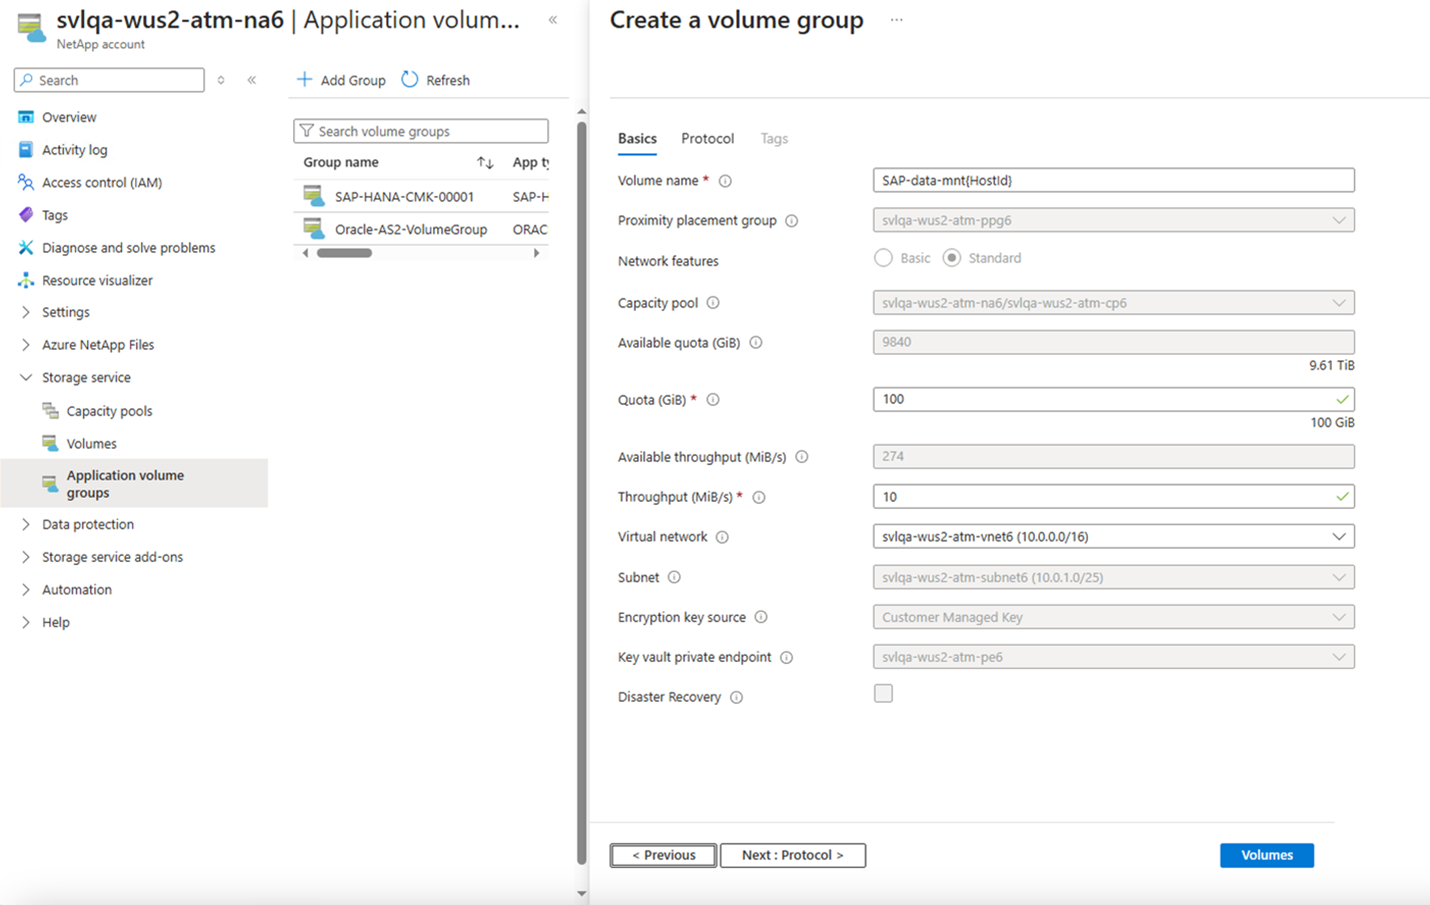
When you select a volume, you can change the following values in the Basics tab:
- Volume Name:
It's recommended that you retain the suggested naming conventions. - Quota:
The size of the volume. - Throughput:
You can reduce the throughput requirements for development or test systems accordingly to the value required for your use cases. - Encryption key source: Select Customer Managed Key or Microsoft Managed Key. If you choose Customer Managed Key, provide the key vault private endpoint.
Select Next: Protocols to review the protocol settings.
- Volume Name:
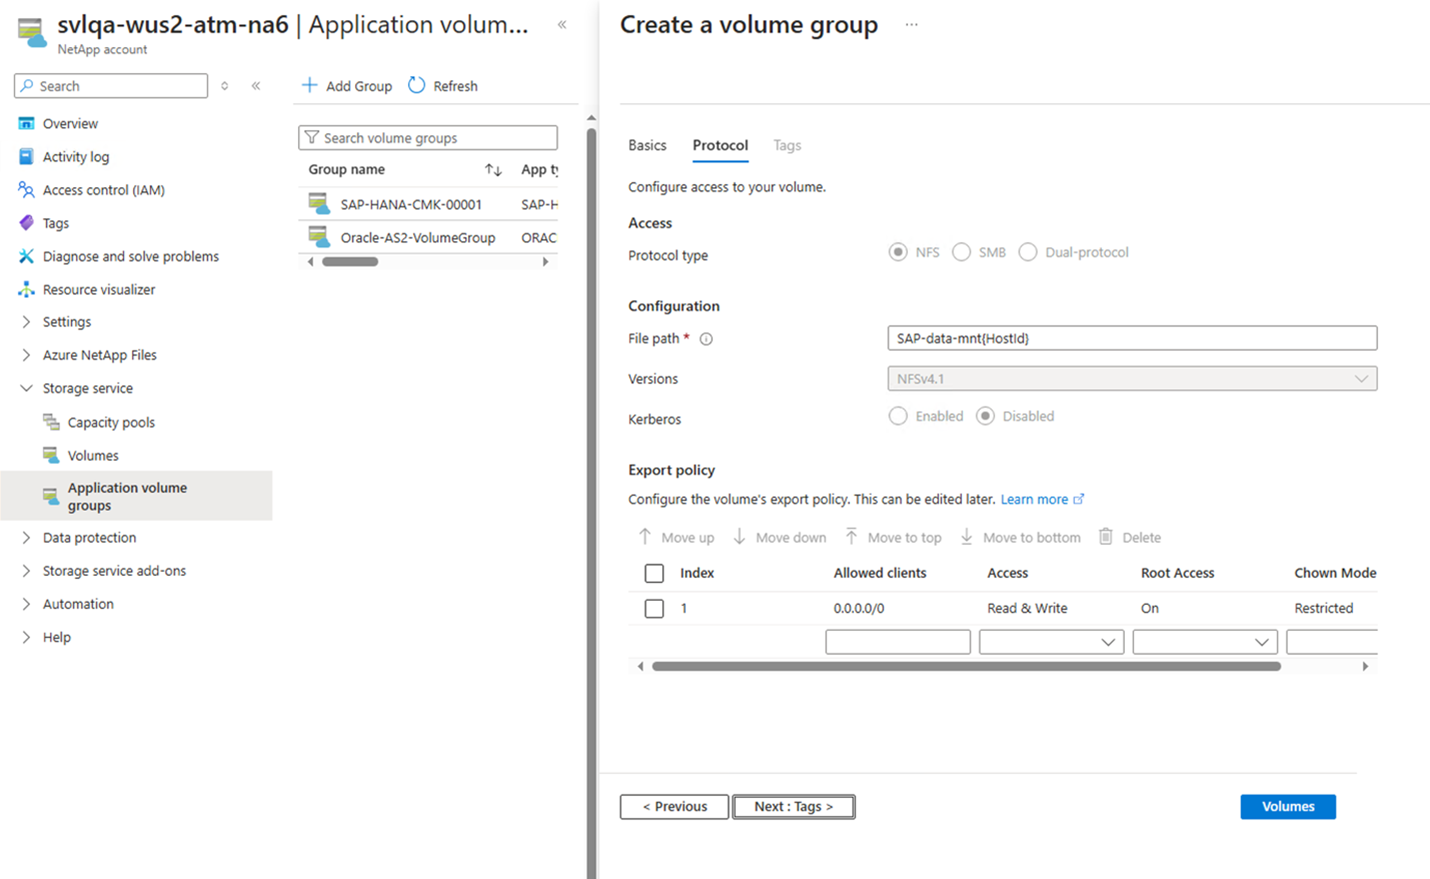
In the Protocols tab of a volume, you can modify File path (the export name where the volume can be mounted) and Export policy as needed.
You cannot change the protocol for the data and log volumes.
Select the Tags tab if you want to specify tags for a volume. Or select Volumes to return to the Volumes overview page.
The Volumes page displays volume details.

If you want to remove the optional volumes (marked with a
*), such as data-backup volume or log-backup volume from the volume group, select the volume then select Remove volume. Confirm the removal in the dialog box that appears.Important
You cannot add a removed volume back to the volume group again. You need to stop and restart the application volume group configuration.

Select Volumes to return to the Volume overview page. Select Next: Review + create.
The Review + Create tab lists all the volumes and their creation method. Select Create Volume Group to start the volume group creation. This process can take a few minutes to complete.
A notification confirms when the operation completes successfully. When you see this message, you can select Go to resource to view the newly created volume group.


Next steps
- Understand Azure NetApp Files application volume group for SAP HANA
- Requirements and considerations for application volume group for SAP HANA
- Add hosts to a multiple-host SAP HANA system using application volume group for SAP HANA
- Add volumes for an SAP HANA system as a secondary database in HSR
- Add volumes for an SAP HANA system as a DR system using cross-region replication
- Manage volumes in an application volume group
- Delete an application volume group
- Application volume group FAQs
- Troubleshoot application volume group errors